
My Wedding Invitations

By Cards

Hi All,

Today I have a super special post to share with all of you. As many of you know I am quite a do-it-yourself type person. I don’t know what it is about me, but I just love a challenge when it comes to design. If something doesn’t exist, I want to create it. It’s just how I am.

Recently, I’ve had people ask me about my wedding and different experiences I had in the planning process. You should know – I was my own wedding planner (no surprises there). I really didn’t find the need to have a liaison between myself and a vendor. So when it came to wedding invitations I found the supplies I needed and asked my awesome fiancé (now husband) to help me out.

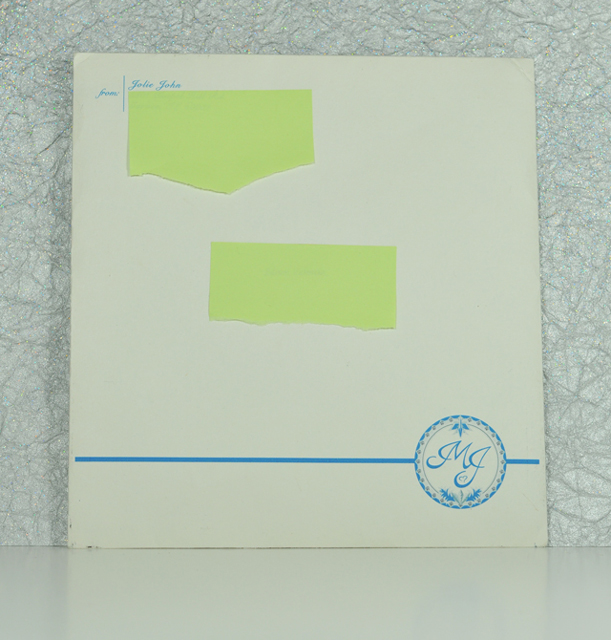
I wanted a logo that featured our initials and loved the ideal of a seal to use on our envelope. He made it happen. We ended up using this logo on our wedding favors too (I may do a separate post on those if requested).

Here’s the mailing envelope. I covered the addresses with a post-it for privacy reasons.

Invitation1

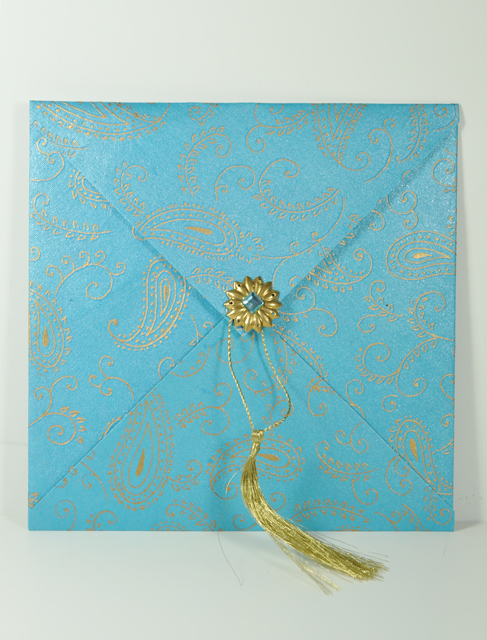
I chose a teal blue with accented gold card stock paper. We mail-ordered it from India.

We added a little accent to the embellishment on front and secured it to the invitation.

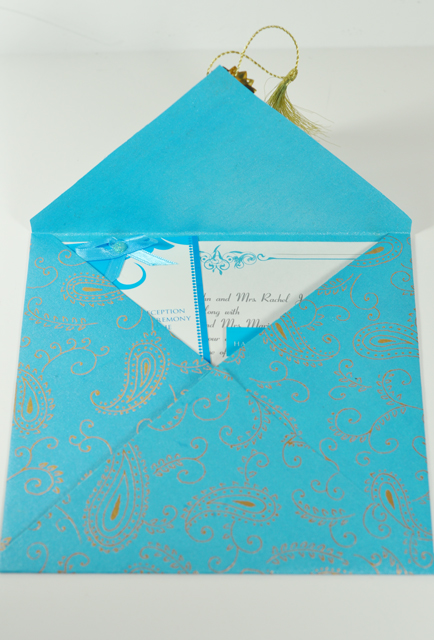
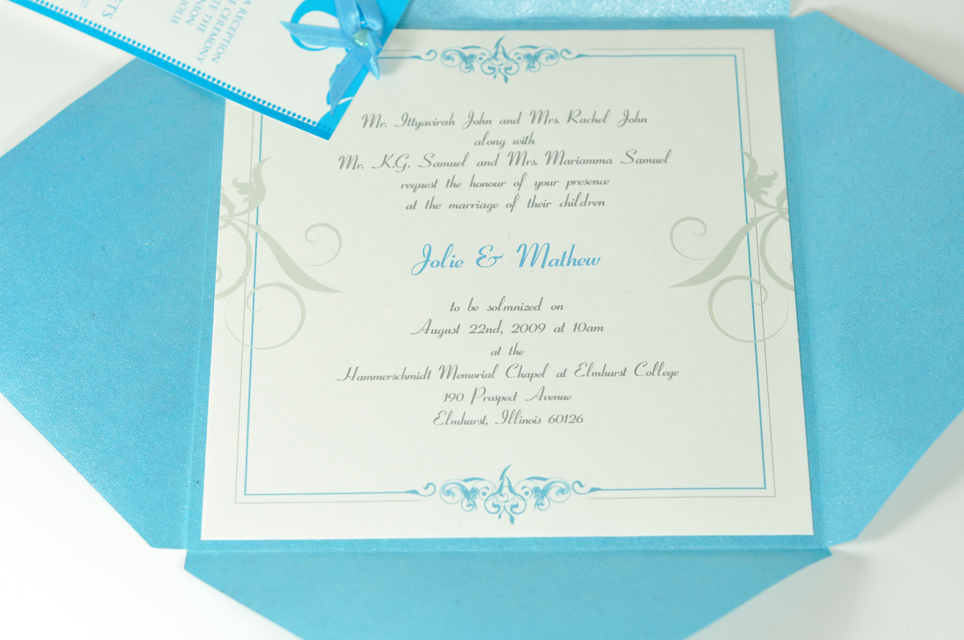
Here’s how it looked after the recipient opened the mailing envelope.

Invitation2

Then just flip open each tab…

Invitation3

And here is the actual custom invitation. We printed the reception card on glossy paper and had the invitation on matte white. It doesn’t show up all too well in the pictures, but you can definitely see a color difference. I thought it was a great contrast.

Invitation4

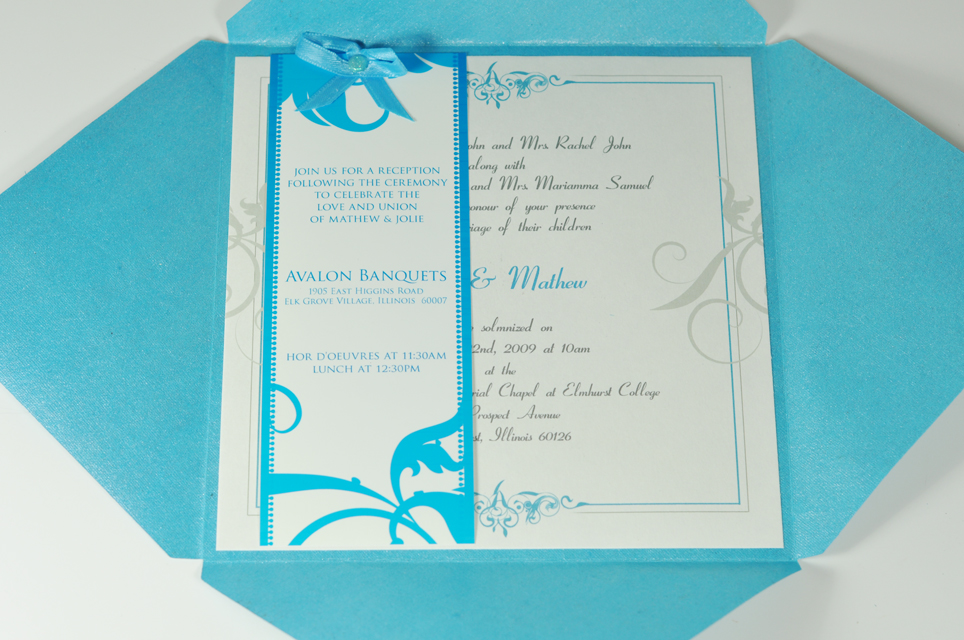
I attached the reception card using a brad. This made the reception card turn to reveal the full wedding invitation.

Invitation5

We also included a mini postcard with directions to the event and a card with our registry information.

Invitation6

These invitations were so much fun to make. I absolutely love the way they turned out. I even created a couple extra to keep for myself.

Simply Lovely

By Cards

Hi All,

For today’s project I went back to my custom framing roots and created this framed wonder. It was originally an old 11×11 white frame with beige and black matting. It was nothing special but made of great materials. Truly, it was just begging to get a face-lift.

First I created my art using some wafer thin dies from W Plus 9’s Fresh Cut Florals. These stamps are very friendly to customization. It is one of the few stamps I have that you are able to layer images. If you notice, each element has been stamped multiple times to build layers.  It was my first try using them…and I am pretty much in love. I’ll have to mess around with them some more to see what else I can create.

Then I used some quality heavy weight designer papers to create some matting (matting is the border around the image) and added some trim to cover up the beige beveled edge that was previously on the mats.

To Jolie-fy the frame itself,  I painted it silver and dry brushed in some more silver. Then I took out some aggression and textured it like a maniac. No…not really. I did texture it, but I wasn’t angry.

I used one of my ALL TIME FAVORITE brands of glass cleaner to make the glass look like new (it was VERY hazed). If you have some mirrors or glass that is hazed from age, sun or any other weather…this stuff works wonders. Its the brand custom framers use to clean up some of the worst-conditioned frames that customers bring in.

And after ALL those steps….Here’s the final piece.

Simply Lovely Frame

Happy Birthday 2 U!

By Cards

Hi all,

How about a dimensional card today? This card is loaded with layers and textures. I wanted to play up the stamp and create a visual impact by using negative space for the stamp. I’ll admit there were many failed attempts on this card. For those of you that are crafters – DO NOT use glossy accents on images colored with stamp markers until those markers are absolutely 100% dry. I speak from experience (SO MANY SMUDGES!).

Happy Birthday 2 U

Supplies:

Card Base: Hero Hues Notecard – Neutrals

Paper: My Minds Eye , American Crafts Card stock

Embossing: Cuttlebug Dots Dry embossing

Stamp: Stampendous

Ink : Momento Tuxedo Black

Markers : American Crafts Stamp Markers

Circle Cutter: Martha Stewart Circle Cutter