
Hi All,
This past weekend marked a “Hallmark Holiday” like no other – International Card Making Day! For many in the crafting world, it is a great way to share and encourage one another. For me, it’s a fun way to see what other cardmakers are up to, and in the process, I tend to find some products that I may feel like trying out. It’s also a great way to meet some new folks and in on some craft themed conversations.
This holiday also marks the start of the holiday card making season. It’s a time when it seems new products are widely released and available. Now I’ve got to be honest and say I’ve started my holiday cards a few weeks ago. I’m not much of a Halloween card maker, so I just seem to skip right over that and go directly into Christmas. One thing I like to do around this time of year is to join a holiday-themed card class. Typically that involves taking a course over at Online Card Classes. Call it a type of continuing education of sorts – I love what they share over there and it sparks the start to so many more ideas! This class is called Merry Making and it has already taught something I didn’t know – Bokeh! Upon googling the term, I realized I knew the look, but didn’t have a word to define it. Have you ever had that? Where you know what something looks like or how to describe it, but you don’t know the technical term for what it is your describing? …Well, that’s how I felt immediately after looking this up!
I wanted to give the technique a try and recreate an image I saw in my google search. It had a gradient of greens to blues and a bokeh filter on top. I thought it would be a gorgeous background for a simple sentiment.
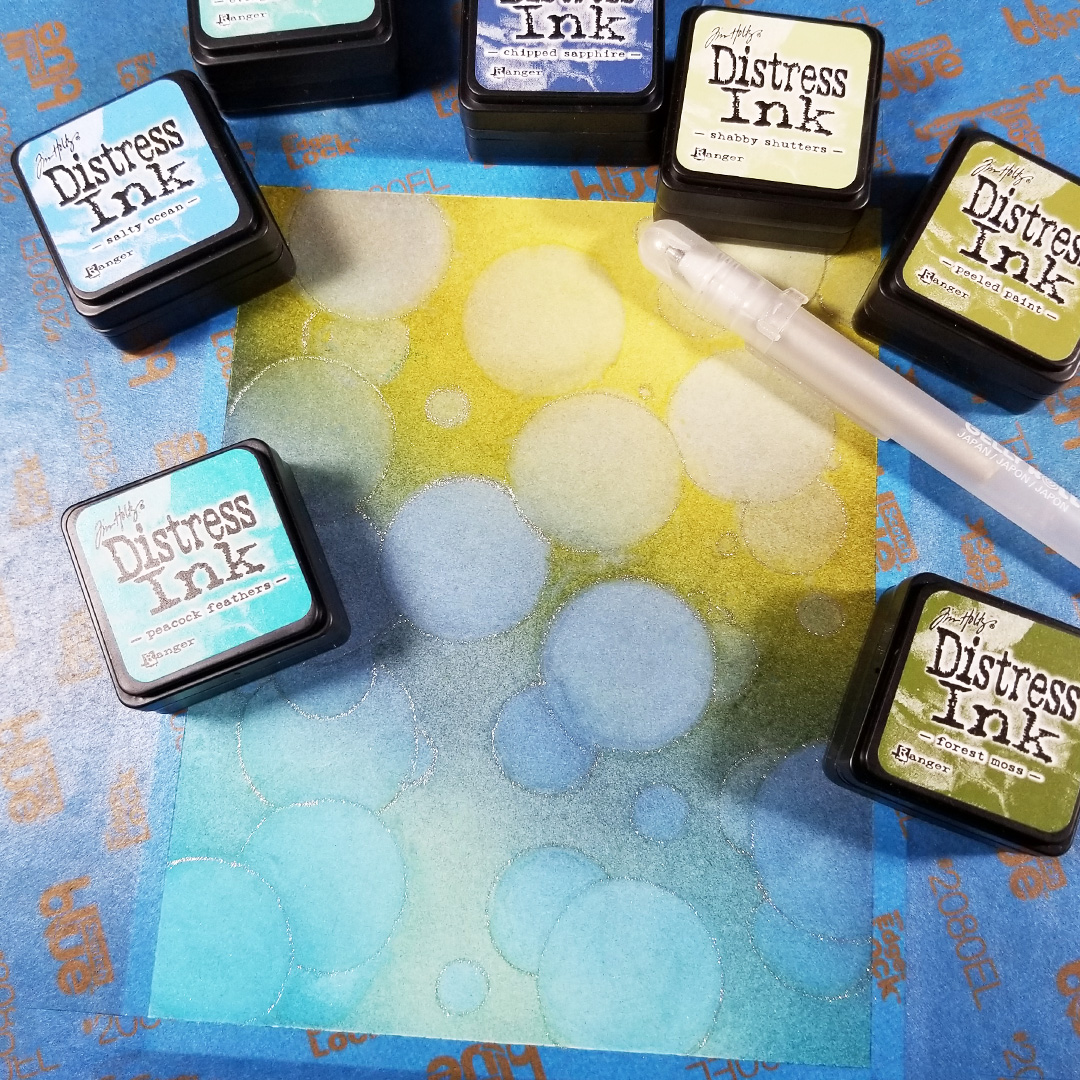
I decided to use Tim Holtz Distress Inks in the colors Shabby Shutters, Evergreen Bough, Peeled Paint, Forest Moss, Peacock Feathers, Salty Ocean and Chipped Saphire. I made sure to blend the inks very well and use a light hand in the process as well. Here’s a look at the inks all blended and highlighted (I shared this picture over on my Instagram)

To create the bokeh pattern I used some clean water and my no.4 Silver Black Velvet watercolor brush to paint circles. Since distress ink reacts with water, the inks pooled up and then were removed with a dry paper towel. I painted several layers on top and besides one another to achieve the look you see. I wanted to define the circle and used a silver gelly roll pen to draw those in.
Here’s a closer look at the shimmery pen details.

It is very subtle but makes all the difference.

Thanks so much for stopping by and I hope to see you again real soon with another holiday project.
