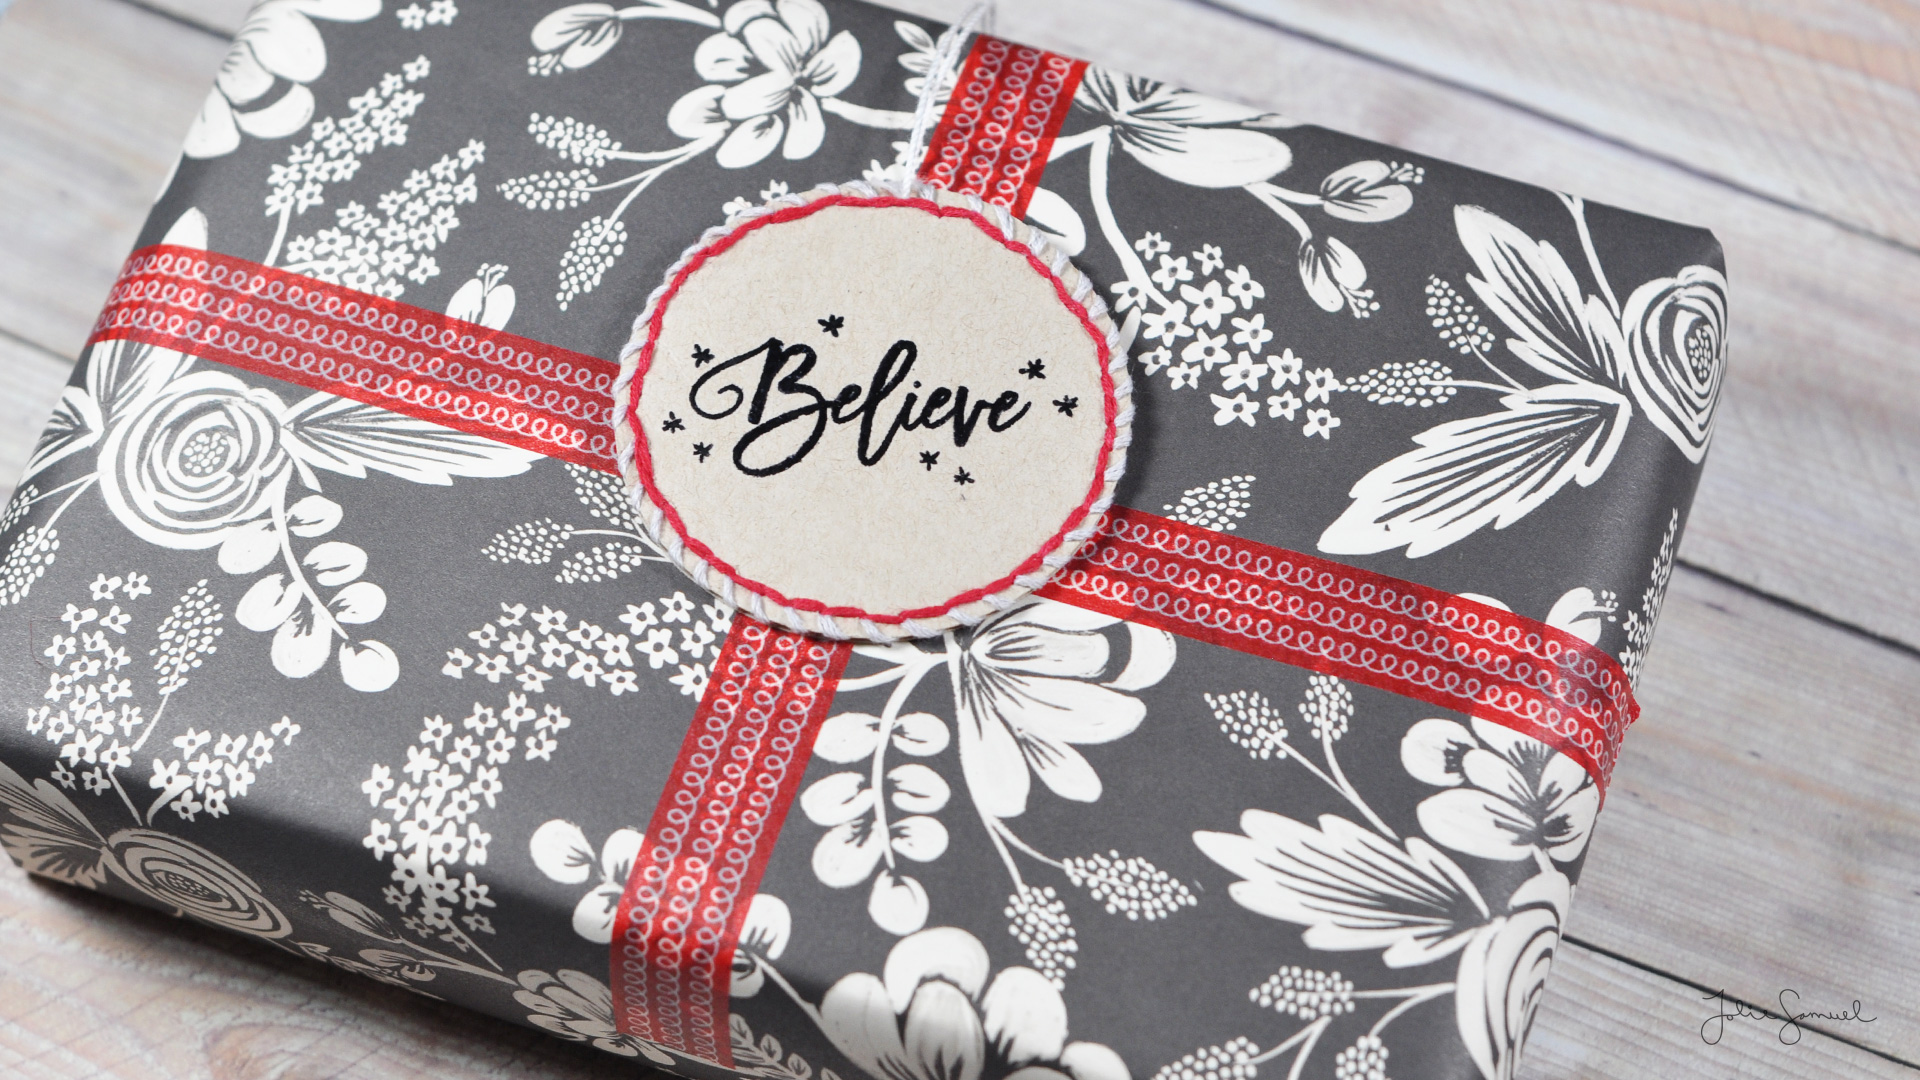
Tag

Silhouette

Holiday Cards – Shimmer and Shine

By Cards

Hi all,

I’m back with more cards for Holiday Style. Here are my versions of shinny, shimmery, and glittery cards! Enjoy!

Gold embossed and wood veneer.

RedPlaidCard1

12×12 glittery cardstock with an illustrated tag

RedGreenStriped

Die-cuts, sequins and faux gold foiling (on bottom of letters).

MerryJoy1MerryJoy2

Stitched With Love – Direct to Paper Inking

By Cards

CS4_participantHi all,

Today’s card features an inky background using a technique taught in class called direct-to-paper inking. The concept is to use white (or any neutral color) card stock and press your ink pad directly to the paper. This technique works great with pigment inks so that you end up with a nice smooth & even tone once the ink dries. On my card I used this technique to get that purplish/red tone card stock.

For this card, all elements were cut using a silhouette cutting machine. To achieve a solid red/purple background I pressed my ink pad directly to paper until the ink soak through to create a solid ‘faux’ colored card stock. Note: This process needs A LOT of drying time. Rushing the process will get you inky fingers & and dirty card (ask me how I know – ugh)! In the process of letting everything dry, I made a bit extra ‘card stock’ to use towards heat embossing my sentiment. Next, to create some dimension I used foam adhesive behind the white circles to pop them up off the card base. To finish off the card I just used some simple border stamps and coordinating ink colors for an embellished stamp design.

I love the fact that this card features a sewing theme. I’ve been searching for a way to use up some of my sewing sentiments! occ_button_card

Love You – Faux Embossing

By Cards

CS4_participantHi all,

We are well into the first week of Clean & Simple 4 and I am in LOVE with this class. There are so many techniques taught daily & many of them are entirely new to me. I love it! Today’s class featured a technique in faux embossing (which almost looks like reverse letterpress in my opinion). For this card I used a sentiment from Silhouette Studio and re-worked it a bit to fit the theme of the card. For the background I chose white-on-white and only have 1 layer of card stock for the sentiment. For the teal parts I stacked 3 layers of card stock so that it would pop off the page.  I love that it almost casts a shadow with so many layers.

The sentiment should read: Love you – Always Have Always Will.

occ_always

Holiday Cards 2014 – Day 20

By Cards

Merry Christmas and welcome to Day 20! We made it!

candycane_house

This is by far and large my favorite project of the whole series. I was so excited when this was completed and knew I wanted to share it for day 20! This house features various intricate cuts that features the use of over 8 different papers and multiple gems. It is decorated on each side too!  So any angle of view is captivating. It can definitely be used to house any little gift or add a little battery powdered tea-light candle to make it a decor piece.This little gem will housed on our coffee table during the holiday season for friends and family to enjoy.

Thanks so much for all your positive feedback on the series and I truly enjoyed putting this together for all my readers. Until next year – I wish you all a blessed and happy holiday season.

-Jolie