
Thrifting Treasures!

By Craftroom Storage, Room Decor

Hi all,

Today I have something a little outside the “norm” for my blog. As some of my friends know, lately I have been into visiting the thrift store to look for projects I can refurbish. I already finished several projects and they have been a hit with friends. As I begin to do more projects, I have decided to document them on the blog to show you just how awesome a little do-it-yourself project can turn out.

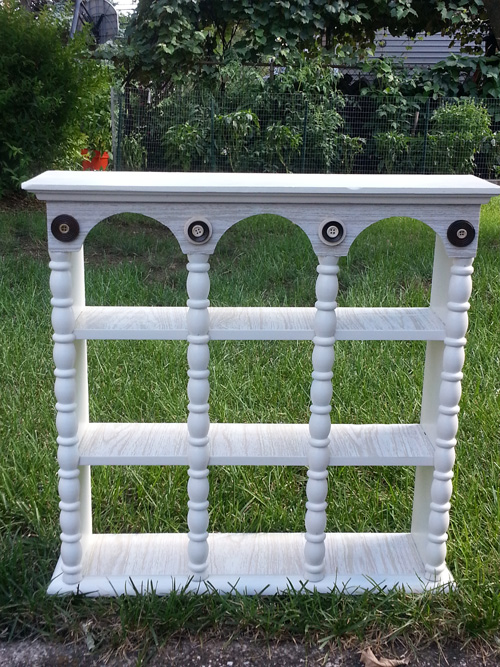
For today’s thrift store find, I found this beautiful shelf at my local thrift store.

Shelf Before - prepped to paint

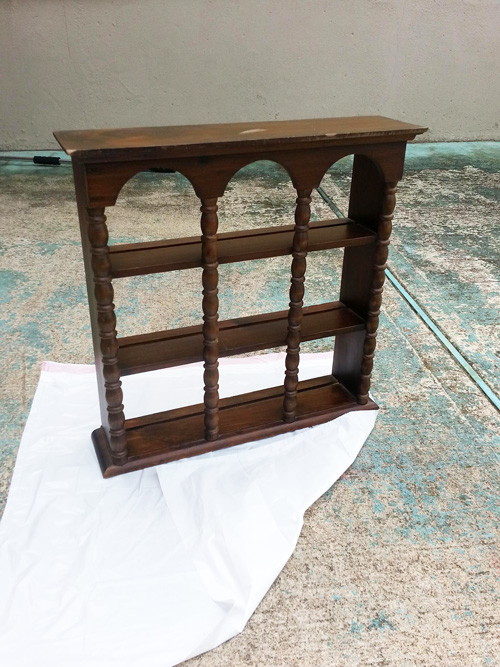
It was in great condition and had just a few minor distressed marks on it. I thought it gave the piece a little character and didn’t mind them at all. I used some lemon all purpose cleaner to remove some debris and dust. I didn’t need to sand it or do any additional work.  Truly, it was in ready-to-paint condition. I gave it about two coats of white spray paint.

Shelf Painted - Ready for embellishments

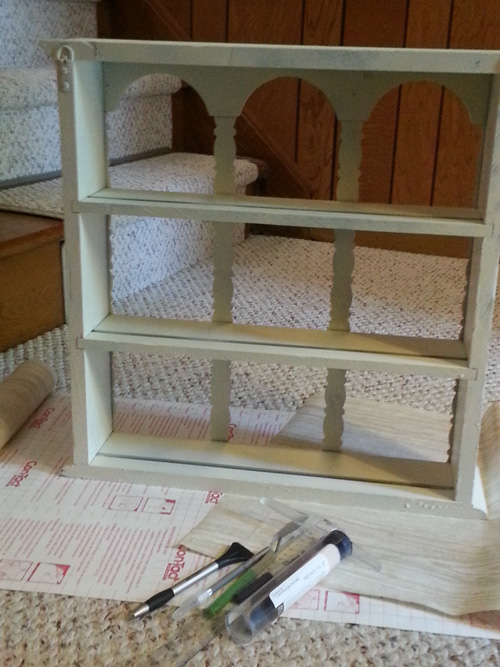
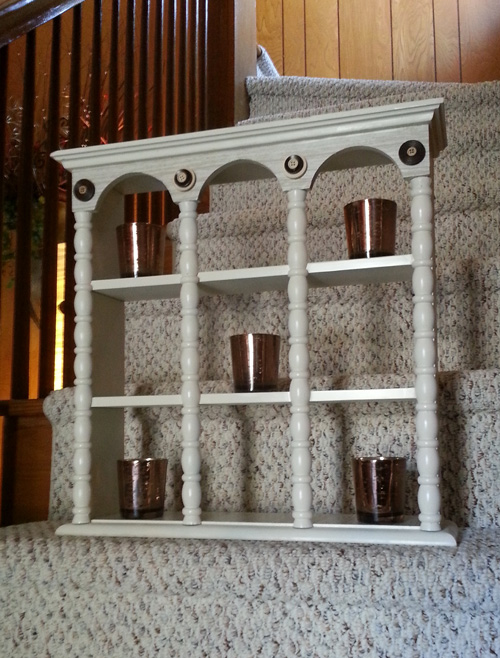
Thankfully the paint dried pretty quickly and the fumes faded out in a few hours. Next, I used some contact paper and embellishments to dress up the entire unit.

Shelf - All Finished!

Here it is! I can’t believe how easy this project was for me. Usually there is some serious back-end work involved before I can get a refurbished piece to look this way. I’m quite happy with this piece and think it looks just as fabulous in person.

Shelf - After

If you’re interested in some unique pieces for your home – check out the local thrift store. You never know what you’ll find!

Happy thrifting!

-Jolie

Using SCAL2 To Create a Card

By Cards

Sympathy

Hi all,

For today’s card, I’ve decided to try to recreate a rendition of a card design I saw by Kristina Werner on her blog. I felt this card layout would be perfect for a friend who was missing her family. To create the window and curtains on the card, I used my die cutting machine and created the template on my computer. I created a window using 4 squares and welded together some other shapes to create the curtain and butterfly cuts.

For extra detail, I used a white gel pen around the edges and some ribbon to finish off the card.

Thanks for visiting & feel free to leave comments!

Trying Alcohol Inks by Tim Holtz

By Cards

Just Because

For this weeks card, I wanted to play with one of my newer ‘toys’. I recently purchased a few alcohol inks by Tim Holtz.  After some research on YouTube I discovered the best way to use the inks would be to use glossy paper. I decided to try using glossy photo paper for my first experiment. I found it the paper works really well and allows for the ink to move around without warping the paper from over saturation. It is is difficult to get precision in patterns with these inks so it seems they are great for more abstract art. I’ve also been playing some more with SCAL2 and found another image that I was able to alter via the trace feature. Overall I think the card turned out very earthy. The background almost looks like an unfocused tree.

I’ve also been playing some more with SCAL2 and found another image that I was able to alter via the trace feature. Overall I think the inks are fun to use, but I will need some practice in color blending with this medium.

Thanks for stopping by and feel free to leave comments!

Handmade Flowers For Handmade Wreaths

By Room Decor

Hey all,

As promised I’m here today with an entirely new project. It’s something a little outside the norm but entirely handmade. As many of you may know, yarn wreaths are totally ‘in’ right now. You can surf through Pinterest and find hundreds of different styles and techniques to making a nice big wreath for your front door or home decor. But there are absolutely no posts (or should i say ‘pins’) on making them miniature. I wanted to make some small ones that could be used to decorate smaller knick-knacks around the house.

I made a quick trip to our local craft store for some yarn and felt…and got to work. Here’s the finished project!

small_wreath_01


I experimented with some stiff felt to create the flowers you see here. Also, I love to distress things and inked up some of the flowers for a more vintage look (yes they were all originally white)!

Here’s another look at those flowers.

small_wreath


And guess what? I just may have a few extras too.

I’ve got more projects lined up to share with you tomorrow. See you then! =)